I've recently been considering the possibility of adding a pickup truck to my fleet. I remember when I was in college, me and my buddy Allen reasoned out that you need at least three vehicles in your fleet: one to drive, one as a long-term project, and one as a back-up in case your driver unexpectedly turns into a short-term project, or even a second long-term project.
On top of that, I've thought for a long time that there would be some obvious advantages to having a pickup truck. Right now I have to borrow a friend's truck to do things like taking an engine block to the machine shop, or taking a differential to be rebuilt, etc. So, because I like old things, and because I like Chevys, I've been looking at old Chevy pickups. I'm especially taken with the 1961 model. It's just so ... ugly. It's hard to resist.
The hardest thing is trying to balance the need for a decent driver against my inner cheapskate and my penchant for what has become fashionably known as "patina." I went to look at a 1961 out in Schertz a few weeks ago. It looked real good in the pictures in the advertisement. It was primered, but appeared to be solid, from what I could see in the pictures. It also had a straight six, which I thought was cool.
When I showed up, I could immediately see that the truck was not what it looked like in the pictures. I'm not sure if someone did a crap job of finishing their bondo repairs, or if it was just unrepaired rust bubbling up, or a little of both, but the body looked really bad under the new primer. Judging from the overspray that I could see, it looked like the engine had been painted in the truck, which implied to me that nothing else had been done to the engine in a while.
I had lost interest before the owner even came out of the house, but I talked to him for a little while anyway. He said at one point that the truck had been sitting in a field for a while before he acquired it. He had described his asking price as "firm" in the ad, but as he realized that I wasn't interested, he started dropping it without me even bringing up the subject. He knocked more than 10% off the asking price in two minutes of casual conversation. "I want you to have this truck, man." Not as bad as I want you to have it, sir.
I once looked at another vehicle that the seller said had been sitting in a field. That was Matilda. I bought her anyway. You can see how that turned out in other posts here. Learning as I go, I guess. In addition to all the rust damage that had to be repaired on the body and floor pans, some of the bumper mounting brackets were pretty rusted up, and there were some parts of the frame that showed some rust damage, too.
Probably the worst part of the frame is the passenger side front corner, where there appears to be some rust damage, and where the vehicle appears to have also sustained damage from a wreck. For example, there is a brace that runs diagonally from the frame rail to the front crossmember on that right front corner of the car. There is a mounting hole that passes through both the frame and the brace, and I noticed a while ago that the two pieces of metal didn't sit flush against each other like they should at that hole.
You can sort of see the gap between the two pieces in this picture:

This recently became an issue when I tried to bolt up some of the aftermarket suspension stuff that I bought. The stock strut rod is supposed to mount to the frame through that mounting hole, with a big rubber bushing that makes it a little more forgiving of the damage from the wreck. The aftermarket strut rod that I got has a hard-mounted bracket with a swivel joint and no bushing to flex or wear out. When I went to bolt that up, I noticed that the lock washer hadn't compressed even though the torque wrench had already clicked. Then I remembered the damage I'd noticed before and realized that it was causing problems.
When I first noticed the damage, I was hoping that the process of bolting up the strut rod would compress the two pieces of metal together, but it didn't work out that way. It looked like there was a lot of crud accumulated between the two pieces of metal, so they couldn't pull together even if they wanted to. So, I stared at it for a while, and then my buddy John said why don't you just cut that brace out, clean out all that crud, and weld it back together.
Well, I wasn't real wild about the idea of cutting up my frame, but the more I thought about the problem, I eventually decided it was the right thing to do. There were three welds at the crossmember and two long welds at the frame. I studied it for quite a while and decided I could get at all of them well enough to do the job with a cutoff wheel on an angle grinder.
Here's a view of the brace running from the frame to the crossmember:

And here's a photo from after I cut it out:

And here's a close-up view of all the crud packed in there:

I'm still not sure what it was. Some of it crumbled away like it was just dirt that had packed in there over time. Other stuff was a lot harder to grind away, and even looked kind of shiny where I cut into it. I know that the factory used lead filler in some of their body work, and I started to worry that maybe they used it in their frame, also. I don't know. I was almost done by the time that occurred to me, so I just finished up. Then I went inside and looked up the symptoms for lead poisoning. Hmmm ... irritability, decline in mental functioning, memory loss. Well shoot, how am I supposed to know if I have that? Sounds like just another day....
Anyway, here's a close-up photo from after I cleaned all the junk out of there:

Then I went back and ground away the powder coating to get it ready for welding back together. The brace would sit nicely in place without anything holding it there, so here you can see how it was prepped for welding:

I figured the best thing to make sure that the strut rod would mount up properly would be to just use the strut rod to hold the pieces together during welding. So I torqued up the strut rod, and then John came over with his welder and stuck it all together:

A photo from after the welding was finished:

Next thing was to paint it all. I was planning to use POR-15 again, because it is supposed to give excellent protection from rust. The heat from the welder looked like it had kind of burned the powder coat in some places, so I went through and ground off any powder coat that looked questionable. There were some scratches in the powder coat around the middle of the crossmember, so I was planning to paint that, too. I went over everything that I planned to paint with something like a 120 grit sandpaper, to scuff up the powder coat and give the paint a better surface to adhere to.
This picture is after paint prep:

This picture is from a similar angle to the first picture and shows that the two pieces of metal are now drawn up closer to each other:

And this photo is after paint:
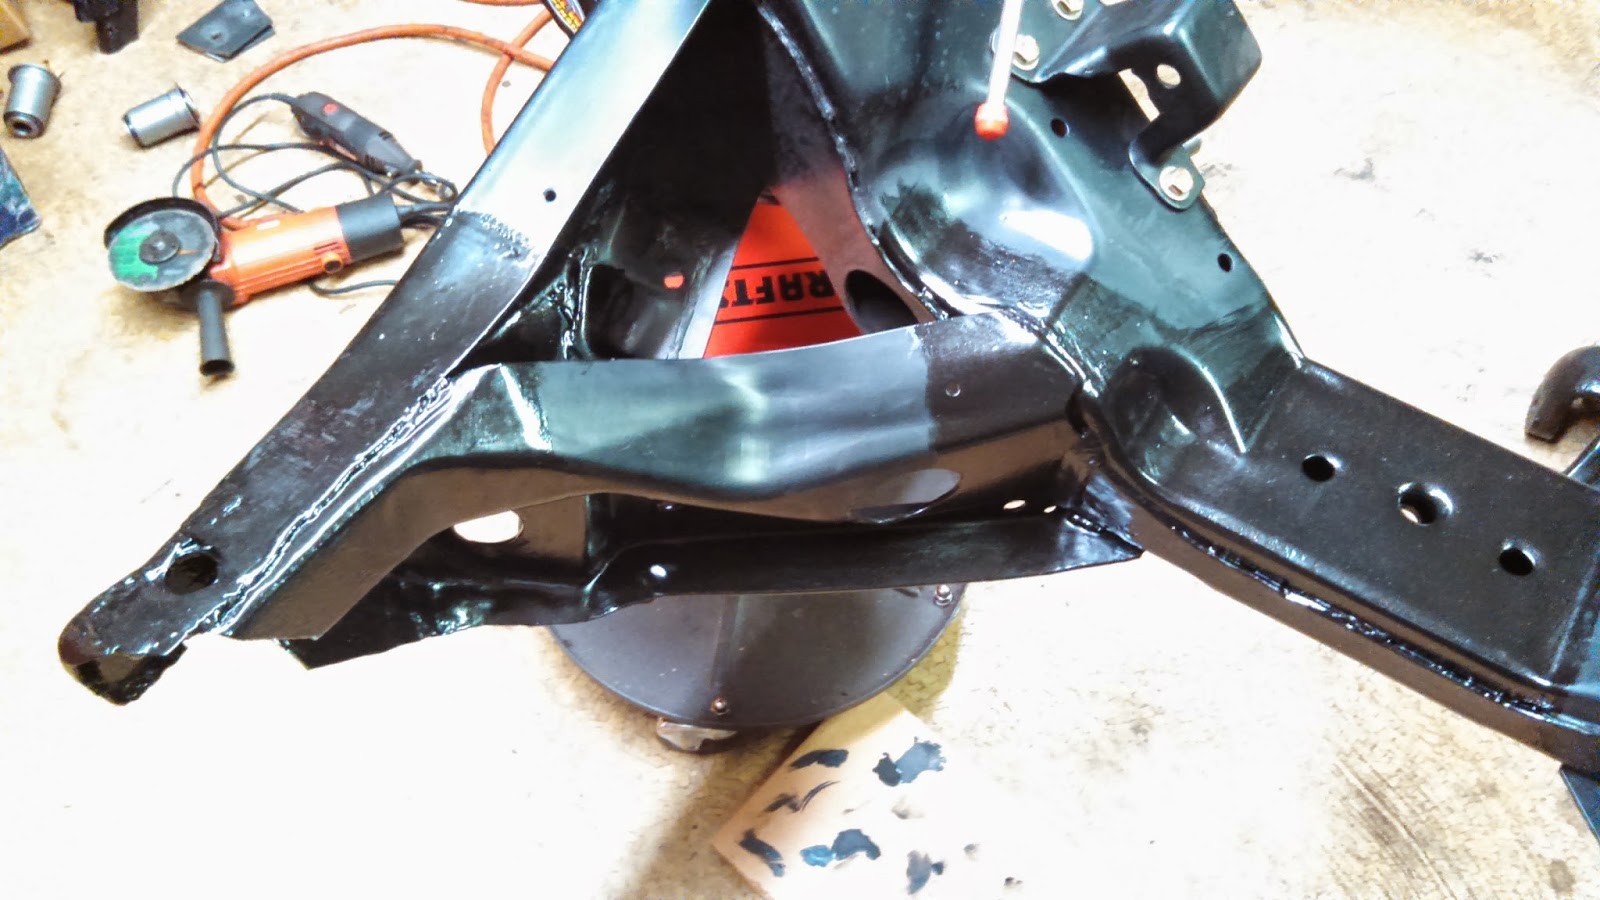
I did four coats of POR-15 semi-gloss black. On the inside where the two pieces of metal come together, I slopped a bunch of paint in there to try to coat and seal everything as best as I could.
Here's another photo showing how much better the two pieces of metal fit together now:

Not sure why the paint looks green-ish there, trick of the light or something, I guess. Anyway, this whole deal was an unexpected setback, but I think it looks like a decent and effective repair.
It should be ready to bolt up the strut rod and the rest of the front suspension now. I think I'm going to need the weight of the engine on the frame to be able to compress the front suspension springs, though, so now I'm working on getting the engine put together. Pictures of that to come.


