The point is, things could easily have turned out differently. There are a lot of cool cars in the world, and if any one of them had grabbed my attention at the right time, maybe I wouldn't be a Chevy guy. So, I consider myself fortunate that things turned out the way they did when I think about the advantages of being a Chevy guy. I don't know if there's any such a thing as a cheap project car, but it would be very difficult to argue that any other make is cheaper than Chevrolet when it comes to getting parts for old models. On top of that, it's equally difficult to argue that any other make has more parts available for old models than Chevrolet. The aftermarket has developed so much support for the most popular Chevrolet models, it is supposedly possible to build a completely brand-new 1967-69 Camaro or 1955-57 Chevrolet, without any original frame or sheet metal to start with. Chevelles are also very well-supported by the aftermarket. Other Chevrolet models may not be quite as well-supported, but it is still much easier to get parts for an old Chevrolet than it is for a huge number of other old cars. So I consider myself lucky to have become a Chevy guy at an early age.
This is all a long-winded way of arriving at the point that it is relatively easy to get reproduction parts for almost any component on an old Chevrolet. But, when you're building a whole car from what was virtually an empty shell, eventually you're bound to find the limits of that key word, "almost." One example of a couple parts that are not available as reproduction parts are the "bumperettes" that hang down off the front bumper. The ones that were on my car when I got it were badly rusted, including a one-inch by three-inch hole rusted completely through one of them. When I told the guy at the body shop that I couldn't find replacements, he recommended that I just try harder to find a used pair, because repairing the ones I had would be very expensive. In the end, my sister somehow found a pair that someone was selling on Facebook for a fair price.
Another example ended up being the heater controls. It's easy to find reproductions of the control head for a car with a heater and air conditioning, but I wasn't able to find any place that offered the control head for a car without air conditioning. One of the control levers for my control head was broken, but after looking around online and not finding any easy replacements, I decided to try to fix it rather than replace it.
In the photo below, if you look carefully at the lever that is farthest down, you might be able to make out where the break is, right above the point where the control cable connects to the lever:

In the next photo below, I bent that lever at the break, to accentuate where the break is:

I think the lever may have actually been OK when I got it, and I may have broken it when I tried to test the heater controls. In addition to moving the control cable, the lever is also connected to a switch on the top side of the control head, and I think that switch had seized up so that when I tried to force the lever through its motion, the 50-year-old pot metal lever actually broke before the switch broke loose. I was able to find a reproduction switch to replace the seized one, but couldn't find a replacement control head.
If you can't tell what you're looking at in those close-ups, here's a shot that shows the whole control head, looking at it from the bottom:

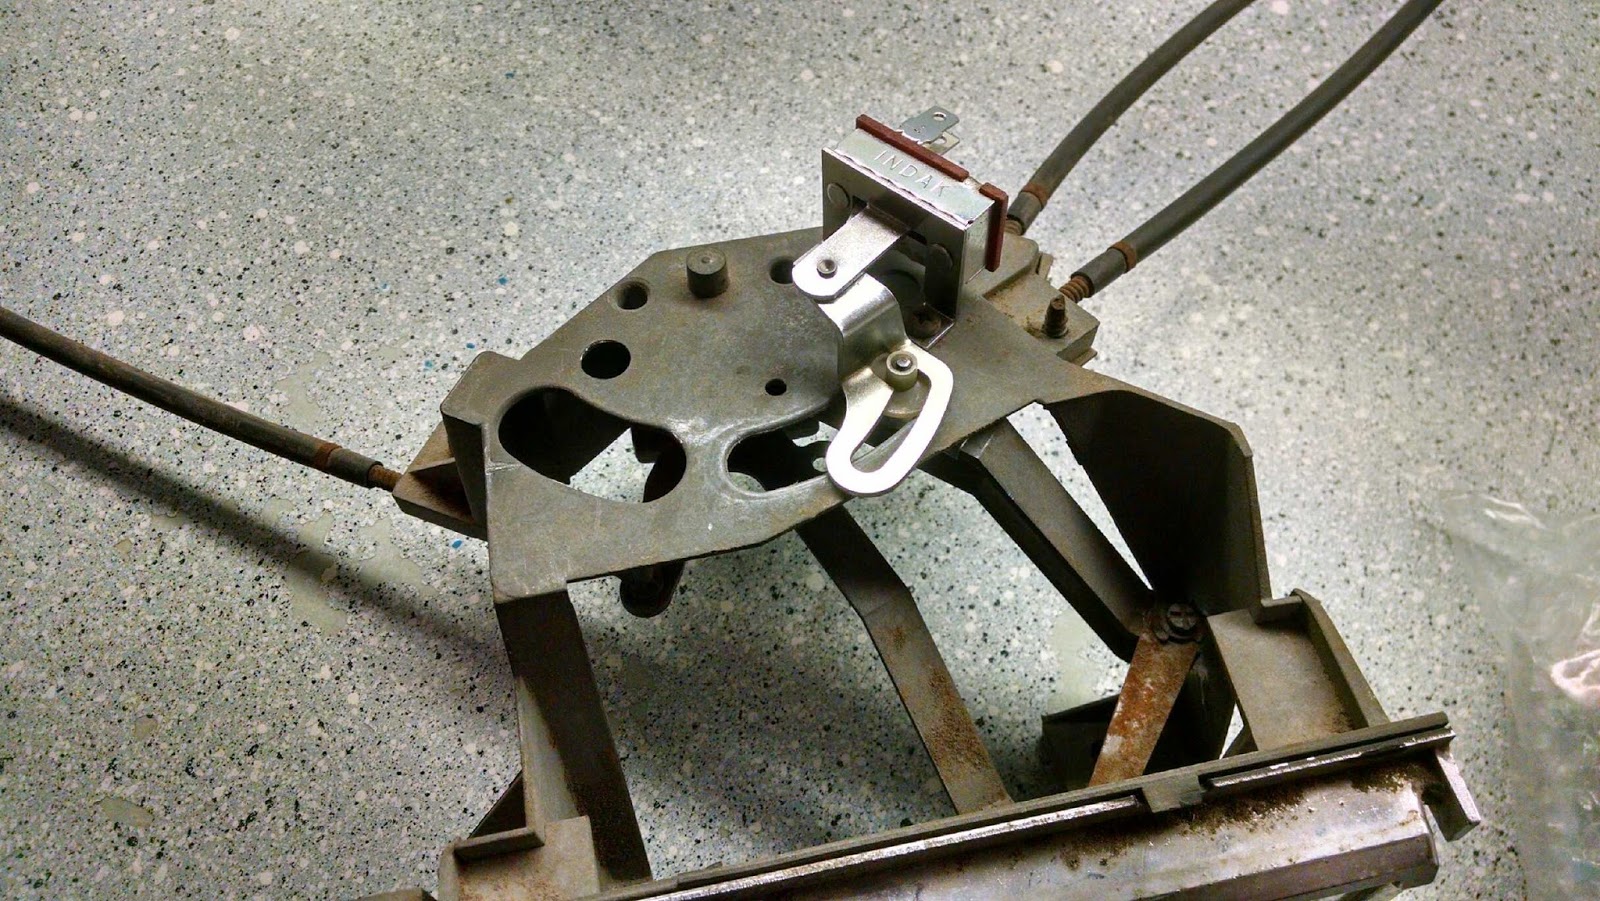
And here's a shot that shows some of the top of it, including the switch that mounts on the top of it:
To repair the broken pot metal, I decided to try to make a small "splint" for it. I started by cutting out a small piece of 22ga steel:

Then I drilled a hole in it and cut some reliefs on the sides, and scored it along a couple of fold lines:

The hole is there to allow the splint to fit over the pin on the top of the lever, which engages the switch. This also serves as a locating feature to keep the splint in its proper position.
Next I slipped the splint into place, so that it fit in between the lever and the control head body, and so that it engaged that pin on top of the lever:

Next, I folded up the sides of the splint so that they ran along the sides of the lever and would keep it from bending at the break:

Then I folded the sides over the top of the lever, for more rigidity. This is why I cut the reliefs into the sides of the splint in the first place, in order to accommodate the shape of the boss around the pin where the control cable is attached:

At that point the splint was pretty functional, but as one last step to help hold everything together and eliminate any slop in the assembly, I poured a small amount of JB Weld along the top of the lever so that it would flow down into the cracks between the lever and the splint and help to hold everything rigid. Once the JB Weld had cured, everything seemed to work pretty well.
The last couple photos show the lever in its two most extreme positions, and the actuation of the switch as a result. The cable attached to the lever opens a vent to allow air flow, and the switch turns on the blower fan.


At the same time that I was working on the lever, I removed the face plate and cleaned it up, polished the bezel around the faceplate, cleaned up the ends of the levers that are visible and painted them black. The pot metal bezel is a little bit pitted with age, but it looks a lot better than it did when I got it, and good enough for my purposes.
So ... there's another thing.


