Pretty much anyone who's reading this will already know that this blog is lagging severely behind the pace set by real life. The project has finally turned a corner and entered a new phase which makes the blog seem almost irrelevant, so it's even harder now to get motivated to update this. But I can occasionally be susceptible to a bit of completism, so here I am again.
At the end of my last entry, I had finally gotten the car to the point where I could drive it back to the body shop for them to finish up the work that I wanted them to do. They had done all the rust repair and the black paint, but there were a couple things still left to do that required the car to be running and driveable. I wanted a white stripe painted down the middle of the car, and I wanted them to hang the exhaust under the car. But the painter and their exhaust guy wouldn't/couldn't take the car if it wasn't running, so after the body was on the car and the black paint was done, I took it back to my house to finish the wiring, give it a functional dashboard, put brake lights in it, wrap the steering wheel in electrical tape for no reason, and other details. (I had planned to put links to relevant entries for each of the items in that list, but that short list is spread over more than a dozen relevant entries, so I decided to just link to the stupidest one.)
I kind of hate temporarily cobbling things together just to make them functional, knowing that I'm going to need to take it all apart and make it "right" later, so it took some time to get all those details finished the way I wanted them. But, a technician at work once asked if it was almost done, and I said no, and he said, "Do you work on it?" and I said, "Almost every night," and he said, "That's good, if you work on it every night, it'll get done," and it turns out he was right. Well ... of course, it can't be overstated that a project car is never "done," but he was right to the extent that I eventually finished enough work to be able to drive it back up to the body shop.
So anyway, the plan was to paint a stripe, hang an exhaust, install some hood pins, and polish off some other details. When I dropped the car off for all this work, one of the guys at the body shop sold me on another idea, which was for them to create a sheet metal cover for the package tray area (the area between the back seat and the rear window). He asked what I was planning to do to cover that area, and I told him I was just going to use a reproduction of the stock upholstery pad that would have come from the factory. He suggested that they could cut out a piece of sheet metal and roll a couple beads in it to give it some rigidity and make it a little more interesting looking, and maybe that would look a little more like the "bare bones" interior of a race car. I liked the sound of that, so I said OK.
This would be just one instance of what would probably become a trend of me driving the owner of the body shop nuts. I had dropped the car off on a Friday, and early the next week I was thinking about the cover for the package tray area, and had an idea. The first time they had the car, they had made a cover for the rear bulkhead, where the back of the rear seat would normally go, and it had holes in it for the roll bar supports to pass through. I guess they must have put the bulkhead cover in place and then installed and welded up the roll bar, so it was all kind of interlocked and pretty much permanently in place when they were done. I started thinking, if they turned the holes in the bulkhead cover into slots that ran up to its upper edge, and then bent the front of the package tray cover down to overlap the bulkhead cover, with corresponding slots so that the slots would overlap to form holes for the roll bar supports to pass through, then maybe the bulkhead and package tray covers could be disassembled and removed around the roll bar. I drew up a picture to try to show what I was thinking and texted it to the owner of the body shop.

He almost immediately texted me back and said that the guy had just finished the package tray cover that morning, or the day before, or something like that. I give it about a 50/50 shot whether that was actually true or he just didn't want to mess around with trying to make sense out of my drawing. Looking at it all together after the fact, I don't think my idea would have worked very well, anyway, I don't think there was actually room to wiggle my package tray design into position around the roll bar supports and everything else. But the cover they'd made looks pretty cool, and I like it, so that was one thing done.
One of the first things they got done after I dropped it off was to get it over to their exhaust guy. I had written them some notes and drawn a picture showing what I wanted, just dual exhaust angling back to a side exit just in front of the rear wheels. I didn't want any H-pipe or X-pipe crossover. Conventional wisdom these days says that you've got to have an H-pipe or an X-pipe if you're serious about performance, but the testing I've seen shows that these are only worth about 5-10hp. That is a very significant gain if you're trying to wring every available bit of power out of your engine, but I guess I'm not serious enough about that to prioritize it over other things. I don't like the sound of an X-pipe exhaust, and I like the sound of no crossover better than I like the sound of an H-pipe. Plus, the advantages of the X-pipe weren't discovered in NASCAR until maybe the 1990s, and I don't know if they were even using H-pipes yet in 1965, so I can always lean on the convenient crutch of "authenticity," which I carefully employ whenever it suits what I already wanted to do. On top of those things, it just simplifies the exhaust arrangement and makes it easier to work on some things under the car if there's no crossover.
Anyway, then the other decision to make was whether to do a straight cut on the exhaust outlet, perpendicular to the length of the pipe, or whether to do a "bologna cut," where the cut would be parallel to the side of the car, and therefore at an angle to the length of the pipe, which creates a more interesting-looking oval-shaped exhaust outlet. I like the look of a bologna cut, but in the end I decided it was too fancy for what was supposed to be race-car styling, so I opted for the straight cut. The guy put in a couple bends that I wouldn't have thought to use, to help keep everything tucked up under the car better, and it came out looking pretty nice.

Another job on the to-do list was to install a set of hood pins. Hood pins are a safety device commonly used on race cars, I guess as an added measure of security to keep the hood from flying open, particularly in a crash when bodywork is bent up and the latch mechanism may be knocked out of alignment. They don't really offer much benefit on a street car, but I just wanted them for the look. "Because race car," as the internet says.
There are a wide variety of different styles of hood pins available in the 21st century, but I just wanted the basic old 1960's style. I discussed and clarified that with the guys at the body shop, but we did not talk about where specifically to locate the hood pins. I thought it went without saying that they would go at the corners of the hood, similar to where they would be located on a 1970 Chevelle SS. It just never occurred to me that anyone would put them anywhere else. So I was surprised when I went to the body shop to pay my bill for the week, and I saw that they had installed them closer to the vehicle centerline.

I had been picturing this in my head, for years now, with the hood pins out at the corners. Seeing it done with them in another position just looked ... weird. And it was really bothering me. I didn't say anything when I first saw them, because ... what can you say? At this point, ten holes have been drilled in the hood (one for each hood pin to pass through and four for the screws that hold down each scuff plate). Relocating the pins at this point would basically require buying a new reproduction hood, painting it black, and then re-doing the hood pin installation. Not cheap, and I couldn't really blame the shop for not doing what I hadn't asked them to do in the first place.
I had first seen the hood pins installed on a Friday, and I kept thinking about them all weekend. I kept looking at the photo I'd taken, and sometimes it would start to look normal to me, but for the most part it was still bothering me. Eventually, I had the idea to check and see where the hood pins were located on the actual NASCAR 1965 Impalas. There is a guy in California who has an actual NASCAR survivor 1965 Impala which he restored and has entered into some vintage racing events, and he has a website about the car and the restoration process. I went and looked at the photos of his car, and I was surprised to discover ... his hood pins were in the same location as mine! Well, this was with the exception that his car had a third hood pin on the centerline of the hood, but I never liked the look of that third pin and I had knowingly chosen to omit it from my car. Anyway, somehow I'd never noticed that on his car before, despite looking through his website many, many times. It still looked a little weird to me, but I felt a lot better about it, knowing that at least it was "authentic." With time I got used to it, and now I think I actually prefer it.
So, that was the hood pins sorted. Eagle-eyed viewers may have noticed some blue tape on the car in the previous photo. This was supposed to illustrate where the stripe would/could go. The owner of the body shop had laid out the tape and sent me a picture, trying to make sure we got the width how I wanted it. You can see that the tape on top of the hood doesn't line up with the tape on the panel just in front of the hood. We had talked about how wide it should be, and he laid it out at eight inches. In another instance of me probably driving him nuts with my indecision, I told him that maybe nine inches would be better, so he moved the tape on the front panel out to nine inches so I could see how that would look. I was kind of sensitive to the width of the stripe, because I had started building a scale model of the car at home, to see how the paint would look before I committed to something on the real car. The first time I tried painting the stripe, I made it too wide, and it looked horrible, so it was really important to me that we get the stripe width correct.
Anyway, we ended up deciding on nine inches, until he sent me one more photo with it laid out at nine inches, right before it was going back to his painter. I looked at the nine-inch layout, and that didn't really look right, either ... I texted him back and said ... I think it needs to be eight-and-a-half inches. I couldn't hear him scream from all the way up in Schertz, but he did text me back and say, "OK, but this is the last time I'm changing it." So it got painted at eight-and-a-half inches. I like it, I think we got it right.
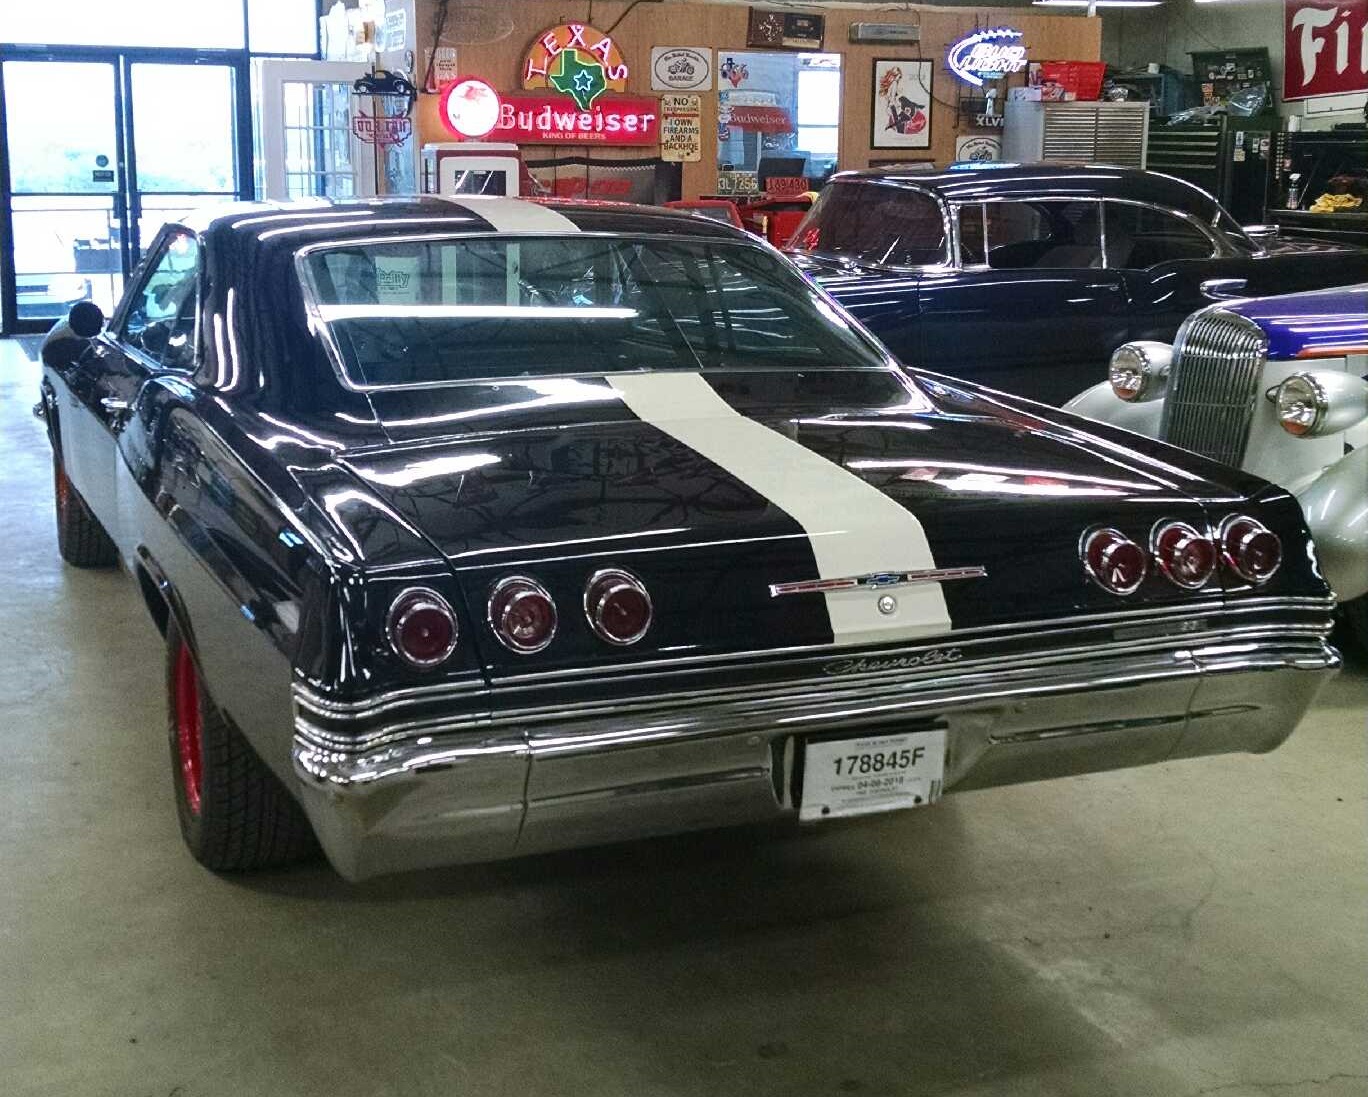
Over the course of the project, I had waffled a few times on whether or not I wanted the stripe. Would it look good? Would it look bad? Would it draw too much attention? If I was going to do it, should it be painted? Should it be a vinyl decal? The vinyl decal would offer the option of removing it, if I decided I didn't like it. But in the end, I decided to go all out, to do the stripe, and to have it painted. So the first time I saw it, I was really kind of nervous about whether or not I was going to like it. And when I did finally see it ... I couldn't really say if it looked good, or if it looked bad. More than anything, it just looked different. I had gotten so used to looking at the car without the stripe over the past several years, the overwhelming first impression was just that it did not look familiar.
After a very short time, though, I got used to it, and I like it a lot. I'm definitely glad that I decided to go for the stripe, because I think it really changes the look of the whole car, in a good way. I think the styling of the '65 Impala makes it look very low and wide. I think the stripe accentuates its "spine" and draws attention to the shape of its silhouette. I think the stripe transforms the look of the car from something like a catfish dragging its belly along a riverbed, to something more like a cat with its back arched in warning. I love the styling of the car, and I think it looks good either way, but the stripe sets this one apart. Anyway, bottom line, I like the stripe, and I'm glad I made that choice.
I talked in earlier entries about how part of the reason I picked a '65 Impala for the project was because '65 was one of the last years before NASCAR started allowing bodywork modifications for tire clearance, so I figured I could get an "authentic," "correct" NASCAR look without having to cut up the wheel wells. I also mentioned above that there is this guy out in California who has restored a real NASCAR survivor '65 Impala, and he was very friendly when I e-mailed some questions to him early in the project. One thing I wanted to ask him was what size tires he has on the car. They appear to be significantly larger than what came stock on '65 Impalas, and I think they are crucial to the look of the car. In fact, sometimes I really don't even like the look of '65 Impalas that are restored to factory stock appearance, because I think their wheels and tires look way too small. So, I was glad that the guy replied with some helpful information about the tires he has on the car.
However, back when I went to pick up the car after its first stay at the body shop, right before I arrived they had bolted on the front fender extensions that form the bottom of the front wheel well, and they discovered that the extensions rubbed the tires when the wheels were turned to certain positions. So that was frustrating, since I thought I had already verified that these tires should fit. At the time, they just removed the extensions and I took the car home to do my wiring, etc., and it was sort of left as an open item to be addressed later. If you look at the first picture of the car in this entry up above, you can see that the front of the fender only goes down to a point just below the bottom of the headlights. In the last picture above, you can see that now the fender extends down below the bumper. That extension is bolted on, and it was just at its bottom corner that it would rub the front of the tire in certain positions.
I wasn't sure what to do about that, but eventually I figured maybe the body shop could just modify those extensions a little bit for clearance. I started looking for pictures online to try to illustrate what I had in mind, and when I started comparing photos of stock Impalas to Impala race cars, I realized that it looked to me like the fender extensions had been modified on the original race cars! That made me feel better about the decision to modify them, and it's such a subtle change, you would never notice it unless you knew what you were looking for. So, that was another thing that got done during the second stay at the body shop, and it's one of my favorite things that they did for me. The photo below shows that fender extension in place, after modification but before the bumper and the front valance were installed.

Watching the car come together, I was starting to develop some apprehension about the quality of the finished paint job. Specifically, as I saw how nice it looked, I started to get nervous about messing it up. I am still kind of fighting between wanting to be very careful not to mar the paint, and trying to force myself to just treat it like what it is, which, at the end of the day, is just a car. At the time that it was at the body shop, I started to feel nervous about installing the grille and bumper and trim, etc., and worrying that I might scratch the paint. Watching shows on the internet, you would see guys at high-end shops taping off edges, wrapping soft rags around corners, and using other tricks while applying the chrome items, to avoid damaging the paint. I started thinking that maybe I should let the guys at the body shop do all that work, so that I wouldn't accidentally scratch or chip something. To be honest, with hindsight, I don't know that they did any better job than I would have done, really. There was, however, another factor involved in that decision, which was time.
All this work was happening through April and May, and at some point I realized that Memorial Day weekend at the end of May would be exactly five years since the first time I went to look at the car before buying it. I thought if I could have them bolt up all those trim pieces, etc., I could get the car home on that Friday before Memorial Day, install some working windshield wipers, and get the car inspected and registered right at the five-year mark. That made an appealing goal, but I could just see myself somehow dragging out the job of getting all that chrome trim, etc., installed over the course of another month, so I decided to let the body shop expedite things. I went ahead and let them install the bumper, the grille, the headlight bezels, the front and rear emblems, the side mirror, etc., and of course they put that all together quite easily.

Along similar lines, part of the upside of letting the body shop handle all this stuff, in my mind, was that I figured they should be a lot more efficient and effective than I would be when it came to aligning panels, installing weatherstrip, aligning windows, etc. There is room for adjustment built into the assembly process for fenders, doors, windows, etc., and getting all those things to line up right takes practice and know-how. It wasn't something I was really interested in, relative to other parts of the project, so I figured I'd let them handle it. In general, that went ... OK. I'm not particularly picky about door gaps and panel alignment, especially compared to some people who are very fastidious about it. Actually, the front door gap on the driver side looks pretty bad, but I kind of like how it gives the car some character. I mainly just wanted things to be functional, although I guess I got mixed results on that front, too.
One particular problem was the driver side door fitment. Aside from the issue with the front gap, the door also just wouldn't close and latch properly. It never latched properly since I got the car, but even after some adjustment, it still wouldn't latch properly. The guys at the body shop found that one of the three bolts that holds that door hinge in place and allows adjustment of the door alignment was broken, so they put some considerable time and effort into getting access to that bolt to repair it. But even after that, the door still wouldn't latch correctly. This went on for a few weeks, as other work was being done, or as things were paused waiting for parts, etc. Every week I'd go up there and the owner would tell me what they'd tried for that door, and it still wouldn't latch. Finally, somehow he decided that maybe the problem was in the latch mechanism itself. He got a replacement, installed it, and it worked great. Another problem solved.
On the other hand, out of the four side windows, I think only one of them ended up being adjusted to where it would keep water out. I was able to adjust another one of them after I got the car back from the body shop, but even now I still need to mess with the door windows some more. The owner of the shop told me he had done what he could with the windows, and he had asked his painter to try because he was supposed to be good at that, but they didn't get them quite right. Sometimes it's a question of know-how ... sometimes it's a matter of nobody else is going to care about it as much as you do. I've messed with them a little bit already. I didn't get them right, either, but I think I know what to do next, when I get around to it.
One other issue was a large crack in the paint by the back window. It ran down the seam between the top of the quarter panel and side of the fill panel that goes between the rear window and the trunk lid. I had first noticed it shortly after getting it home from the body shop the first time, so I pointed it out when I got it back to the body shop for its second visit. The owner took a look at it, and we talked about it, but as work progressed over the next few weeks, it was still there. At some point, I asked about it again, and he said pretty much all the same things he'd said before. All this time, I was thinking it was understood that the crack needed to be fixed, but another week or two later, maybe after the stripe had been painted, I mentioned to the owner that the crack was still there. "Well, it's always going to be there," he said, which was when I first came to understand that he was thinking the best thing was to leave it alone. Hmm.
Well, he is the paint guy, and the reason I brought the car to him was to handle all that stuff. So, if he thinks the best thing is to leave it alone, maybe the best thing is to leave it alone? Still, it kept bugging me. We had actually arranged that I was going to pick up the car on a Saturday and try to hit my five-year target for inspection and registration, but finally on the Friday before, I called him up and said, "Man, I just hate that crack, what can we do to fix it." Well, he didn't sound happy about that, but he said that if I wasn't happy with it then he'd fix it, at no additional cost. So that shot the five-year timeline out the window, but I think it was the right thing to do. And he did fix it up nicely, but it added some additional time to the stay at the body shop. Anyway, that was just about the last thing to get done at the body shop before the car was ready to come back home to my garage.
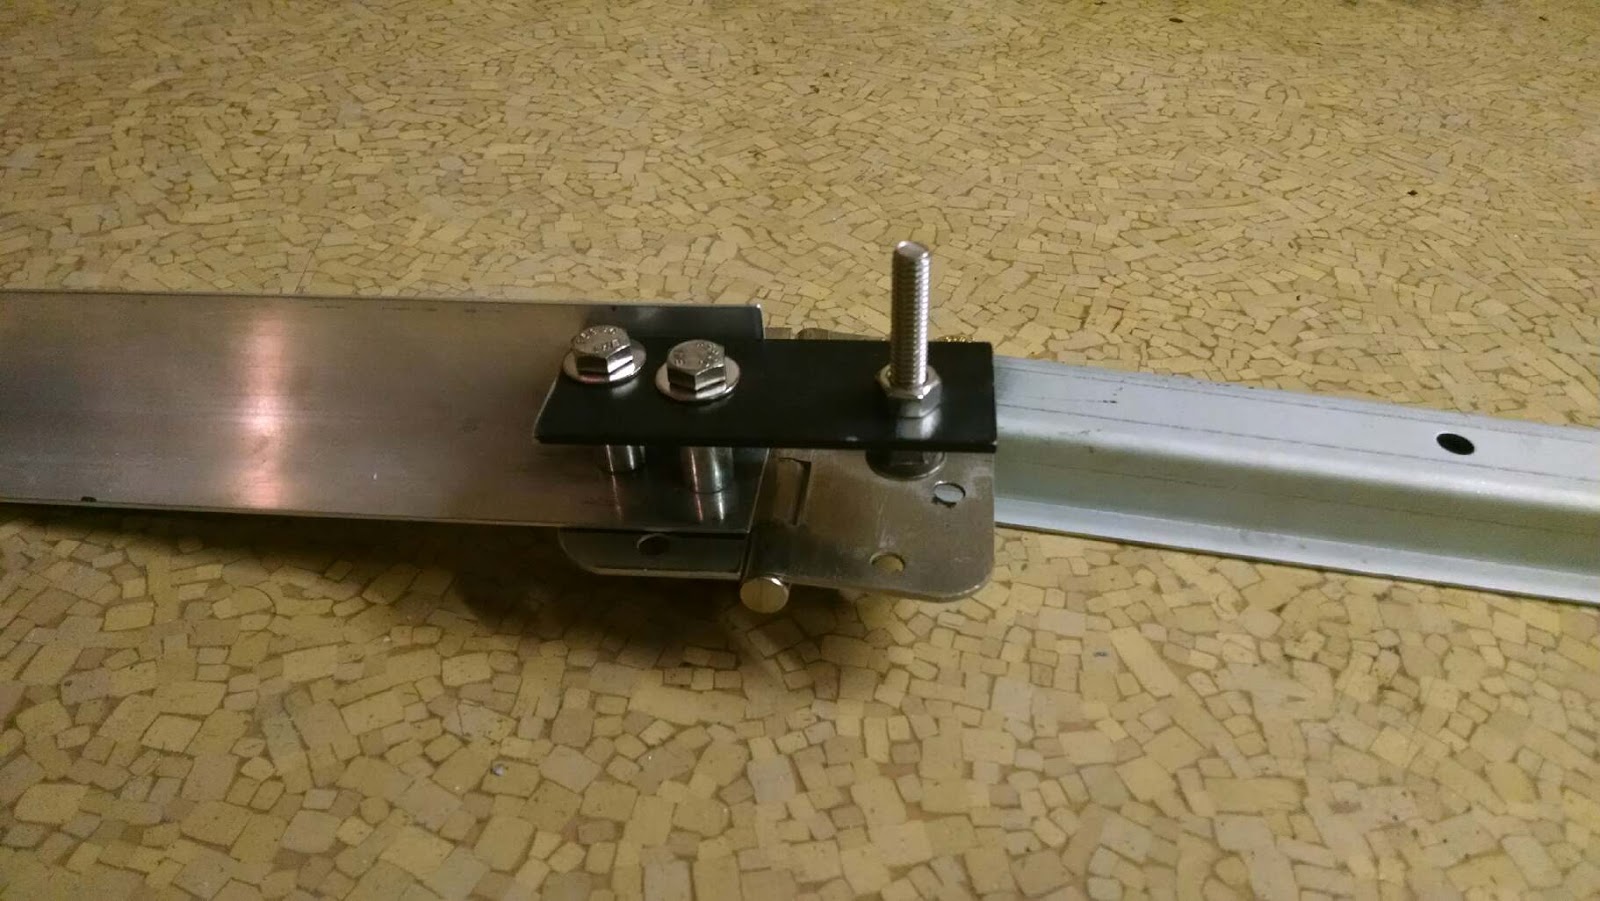
So, while those guys were working on all that, what was I doing all this time? Well, it was nice to have a little bit of a break from working on the car pretty much every night, but I did also still have some components that I could mess with. The main item that I worked on during this time was refurbishing the fresh air vents that mount in the kick panel area down in the footwells. These are vents which draw air from outside the car and can help to provide fresh air to the interior. They are not connected to the blower system, so you don't really get any air flow if the car isn't moving.
The picture below shows how the vent assemblies looked when I got the car and started pulling things apart.

I wrote the "D" and "P" markings on there, to distinguish the driver and passenger side assemblies. The outer housing is black plastic, and it looks like some kind of rodents were chewing on at least one of them. The inner flap that opens or closes to control air flow is made of two thin pieces of steel, riveted together with a piece of rubber sandwiched between them. The rubber extends past the edge of the steel, to seal the gap between the steel flap and the plastic housing.
I feel pretty sure that I took a lot more photos than what I have here, because I wanted to make sure that I got everything put back together correctly. Unfortunately, the four photos included in this entry are all I can find now. You can see that there are some pins and clips and things like that, mostly for connecting the cables that control the flap position, and holding the cables in place as they are routed from the control knobs to the vents.
The photo below shows one of the flaps disassembled after I drilled out the rivets and pulled it apart. Around the middle of the top edge of the picture, you can see a bent piece of rod which forms one of the pins that engages a hole in the plastic housing, where the flap will pivot. You can see a similar pin still connected to the steel flap at the far left edge of the photo, and that's where the cable that controls the flap position would connect. The flap in the foreground has been disassembled, and what you're looking at is the rubber seal between the two pieces of steel. The rubber is old and dry and cracking, and in some places completely broken off where it should be extending out to seal the gap.

After disassembling everything, I threw out the old rubber seals and took all the steel pieces to work to clean them up in a sand blasting cabinet. After cleaning, I coated all the steel with a corrosion inhibitor, then spray painted them black. I ordered a sheet of high-strength multipurpose neoprene from McMaster-Carr. I picked the softest durometer rating they offered, thinking that would help it to conform to surfaces and seal the gaps. When that arrived, I cut out a couple of oversized pieces, sandwiched them between the steel halves of the flaps, and pop riveted everything back together. Then I took a ruler and marked a dotted line at a constant distance from the edge of the steel, then trimmed off the excess rubber along that dotted line.

I cleaned up the plastic housings as best as I could using mineral spirits, if I remember correctly. One of the guys at the body shop had told me that something like that was good for cleaning up those old plastic parts without eating the plastic, and I think it was mineral spirits. Anyway, after cleaning those as best as I could, I put everything back together, and I think they came out looking pretty nice.

All that having been said ... pretty much everything you see in that photo will be out of sight, down under the dash by the floor and hidden behind a grille, so you could easily argue that this was all a waste of time. The only functional benefit was replacing the old rubber sealing surfaces. But, it's satisfying just to take something apart and fix it up and make it nicer and get it back together and working again, so that was good.
One more thing that eventually happened with the fresh air vents: after I had the car back home and was installing the vents, I found that I was missing one of the clips that hold the control cables in place. The cables just have push-pull knobs under the dash, and each one runs through a spiral sheath. So there are clips to hold the sheath in place so that when you push/pull the knob, all of the motion is transmitted through the cable to the vent door. I had taken the cables to work and sandblasted them, too, to knock off some surface rust and clean them up a bit. There is some other mounting hardware for the vents, as well, and I cleaned up some of that and replaced some of the rest of it with generic parts from the hardware section at Lowe's. But, I was missing one of the clips for securing the end of the control cable at the vent assembly. The clip is just a formed piece of metal with a hole in it, so I decided maybe I could just make a replacement. I didn't take any step-by-step photos, but the pictures below show the end results. The piece with nice sharp edges and a well-centered hole is the factory piece. The one that looks like a piece of junk that someone fished out of a garbage disposal is the one that I made. But, it's functional.


I think the basic process for making the part was to cut out a piece of sheet metal in the right size, drill a hole in it, then clamp it in a bench vise and put a bend in it, then hammer that bend over the shaft of a screwdriver to make the curve. Then a hammer and a straight punch to make the little notch feature that grabs the cable sheath, and then I heated it up with a torch and quenched it in water to add some hardness so it would hold its shape. I didn't get the hole in quite the right place, and I guess I miscalculated the required length, because the curve came up a little short of the original geometry. I thought about starting over, to make a nicer one, but this one is perfectly functional, so ... it's fine.
So anyway, that's about it for now. At that point, the body shop had finished everything I wanted them to do, and it was time to bring the car home again. It still needed working windshield wipers before it would be ready to pass inspection, and there were still a lot of other details to address, but it was finally looking like something similar to a functional mode of transportation.
Coming up next time: more stuff.